


Hi y’all!
In this newsletter I am going to review a super important pose! I am traveling this weekend but after that, I should be staying put for awhile, so you can expect more regular communication/schedules! If you’re in the mood the yoga with me, I’ll have one Gentle Vinyasa Wednesday morning at 7am Mountain. Don’t forget, the zoom link is: https://uwmadison.zoom.us/j/7197092876
Ok, now on to the basics!
One thing that really changed my practice was learning how to come into Adho Mukha Svanasana (Downward Dog) in a safe and sustainable manner—which is crazy, because downward dog is a core, foundation pose in most vinyasa classes.
The issue/potential problem with downward dog is that often, we are placing most of the weight into our wrists and hands, energetically pushing down and forward into the floor—long term, this can cause wrist and shoulder issues.
Really, the energy in downward dog should be up and back, lifting out of our hips and pushing our chest and legs back to help our hips rise higher into the sky.
Learn about how to direct this energy in the lil 4 minute video attached, or in the psuedo wikihow below.
First up, let’s talk about our hands, since one of the problems with downward dog is putting too much pressure on our wrists.

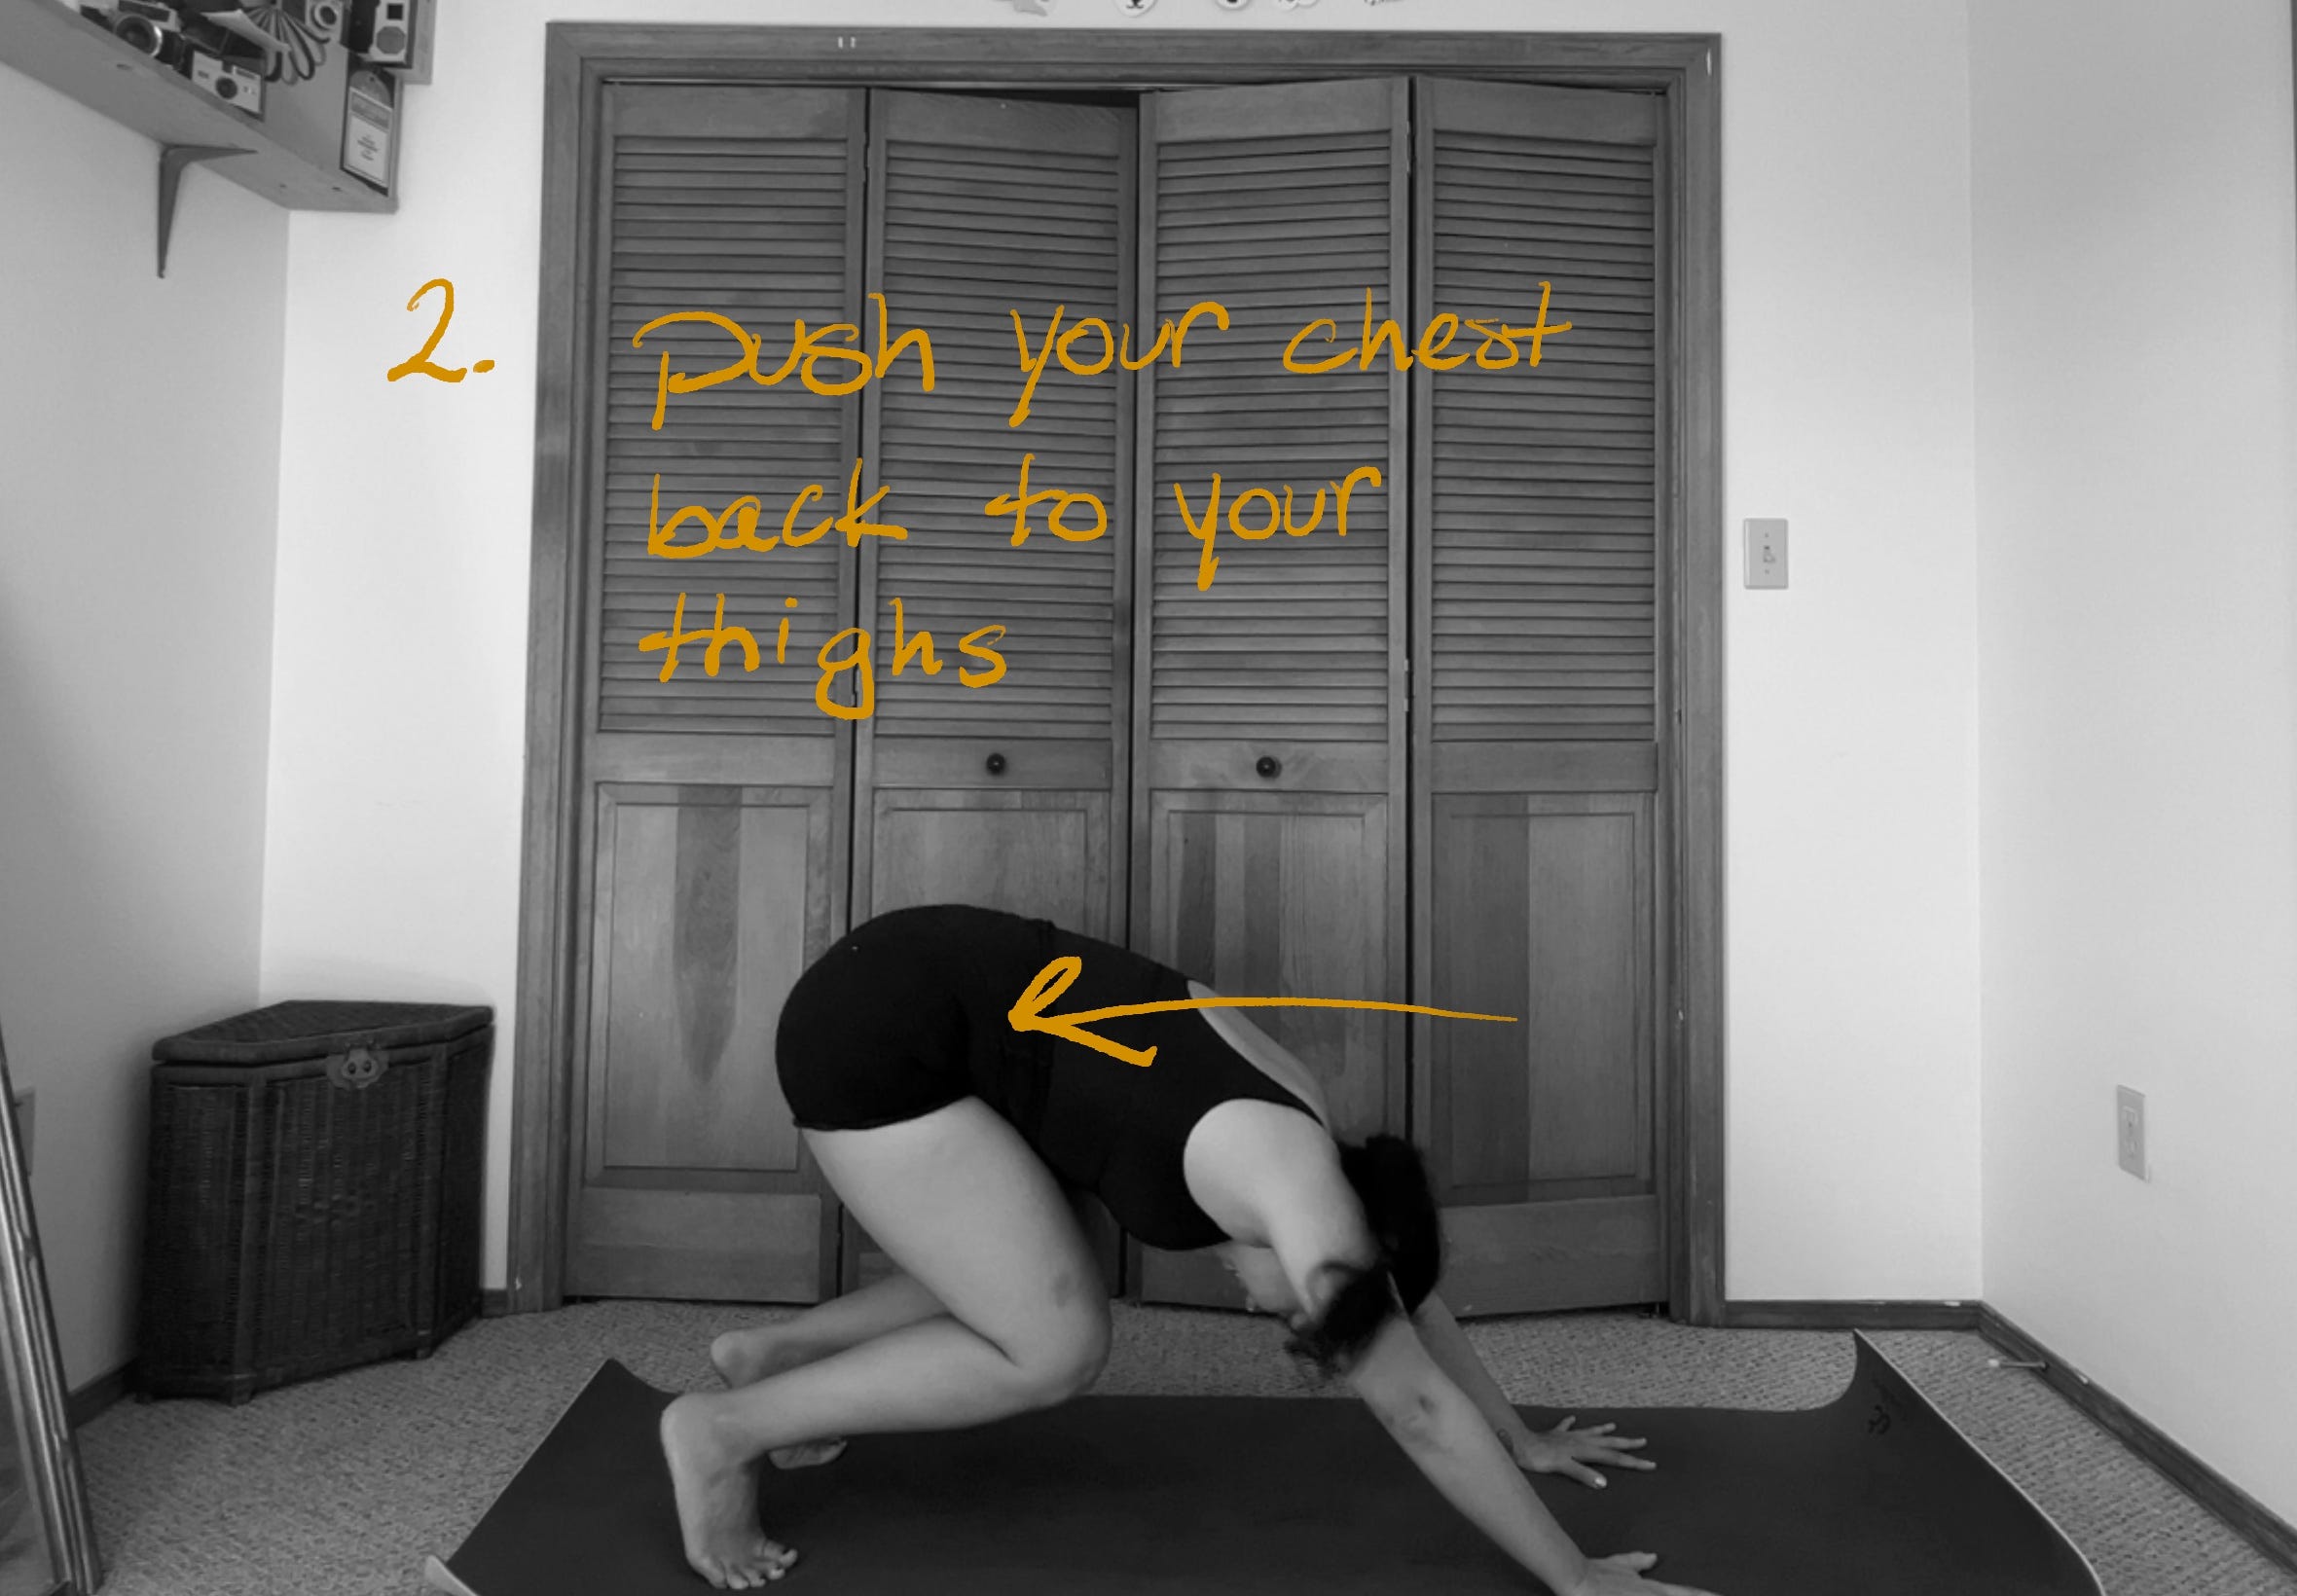
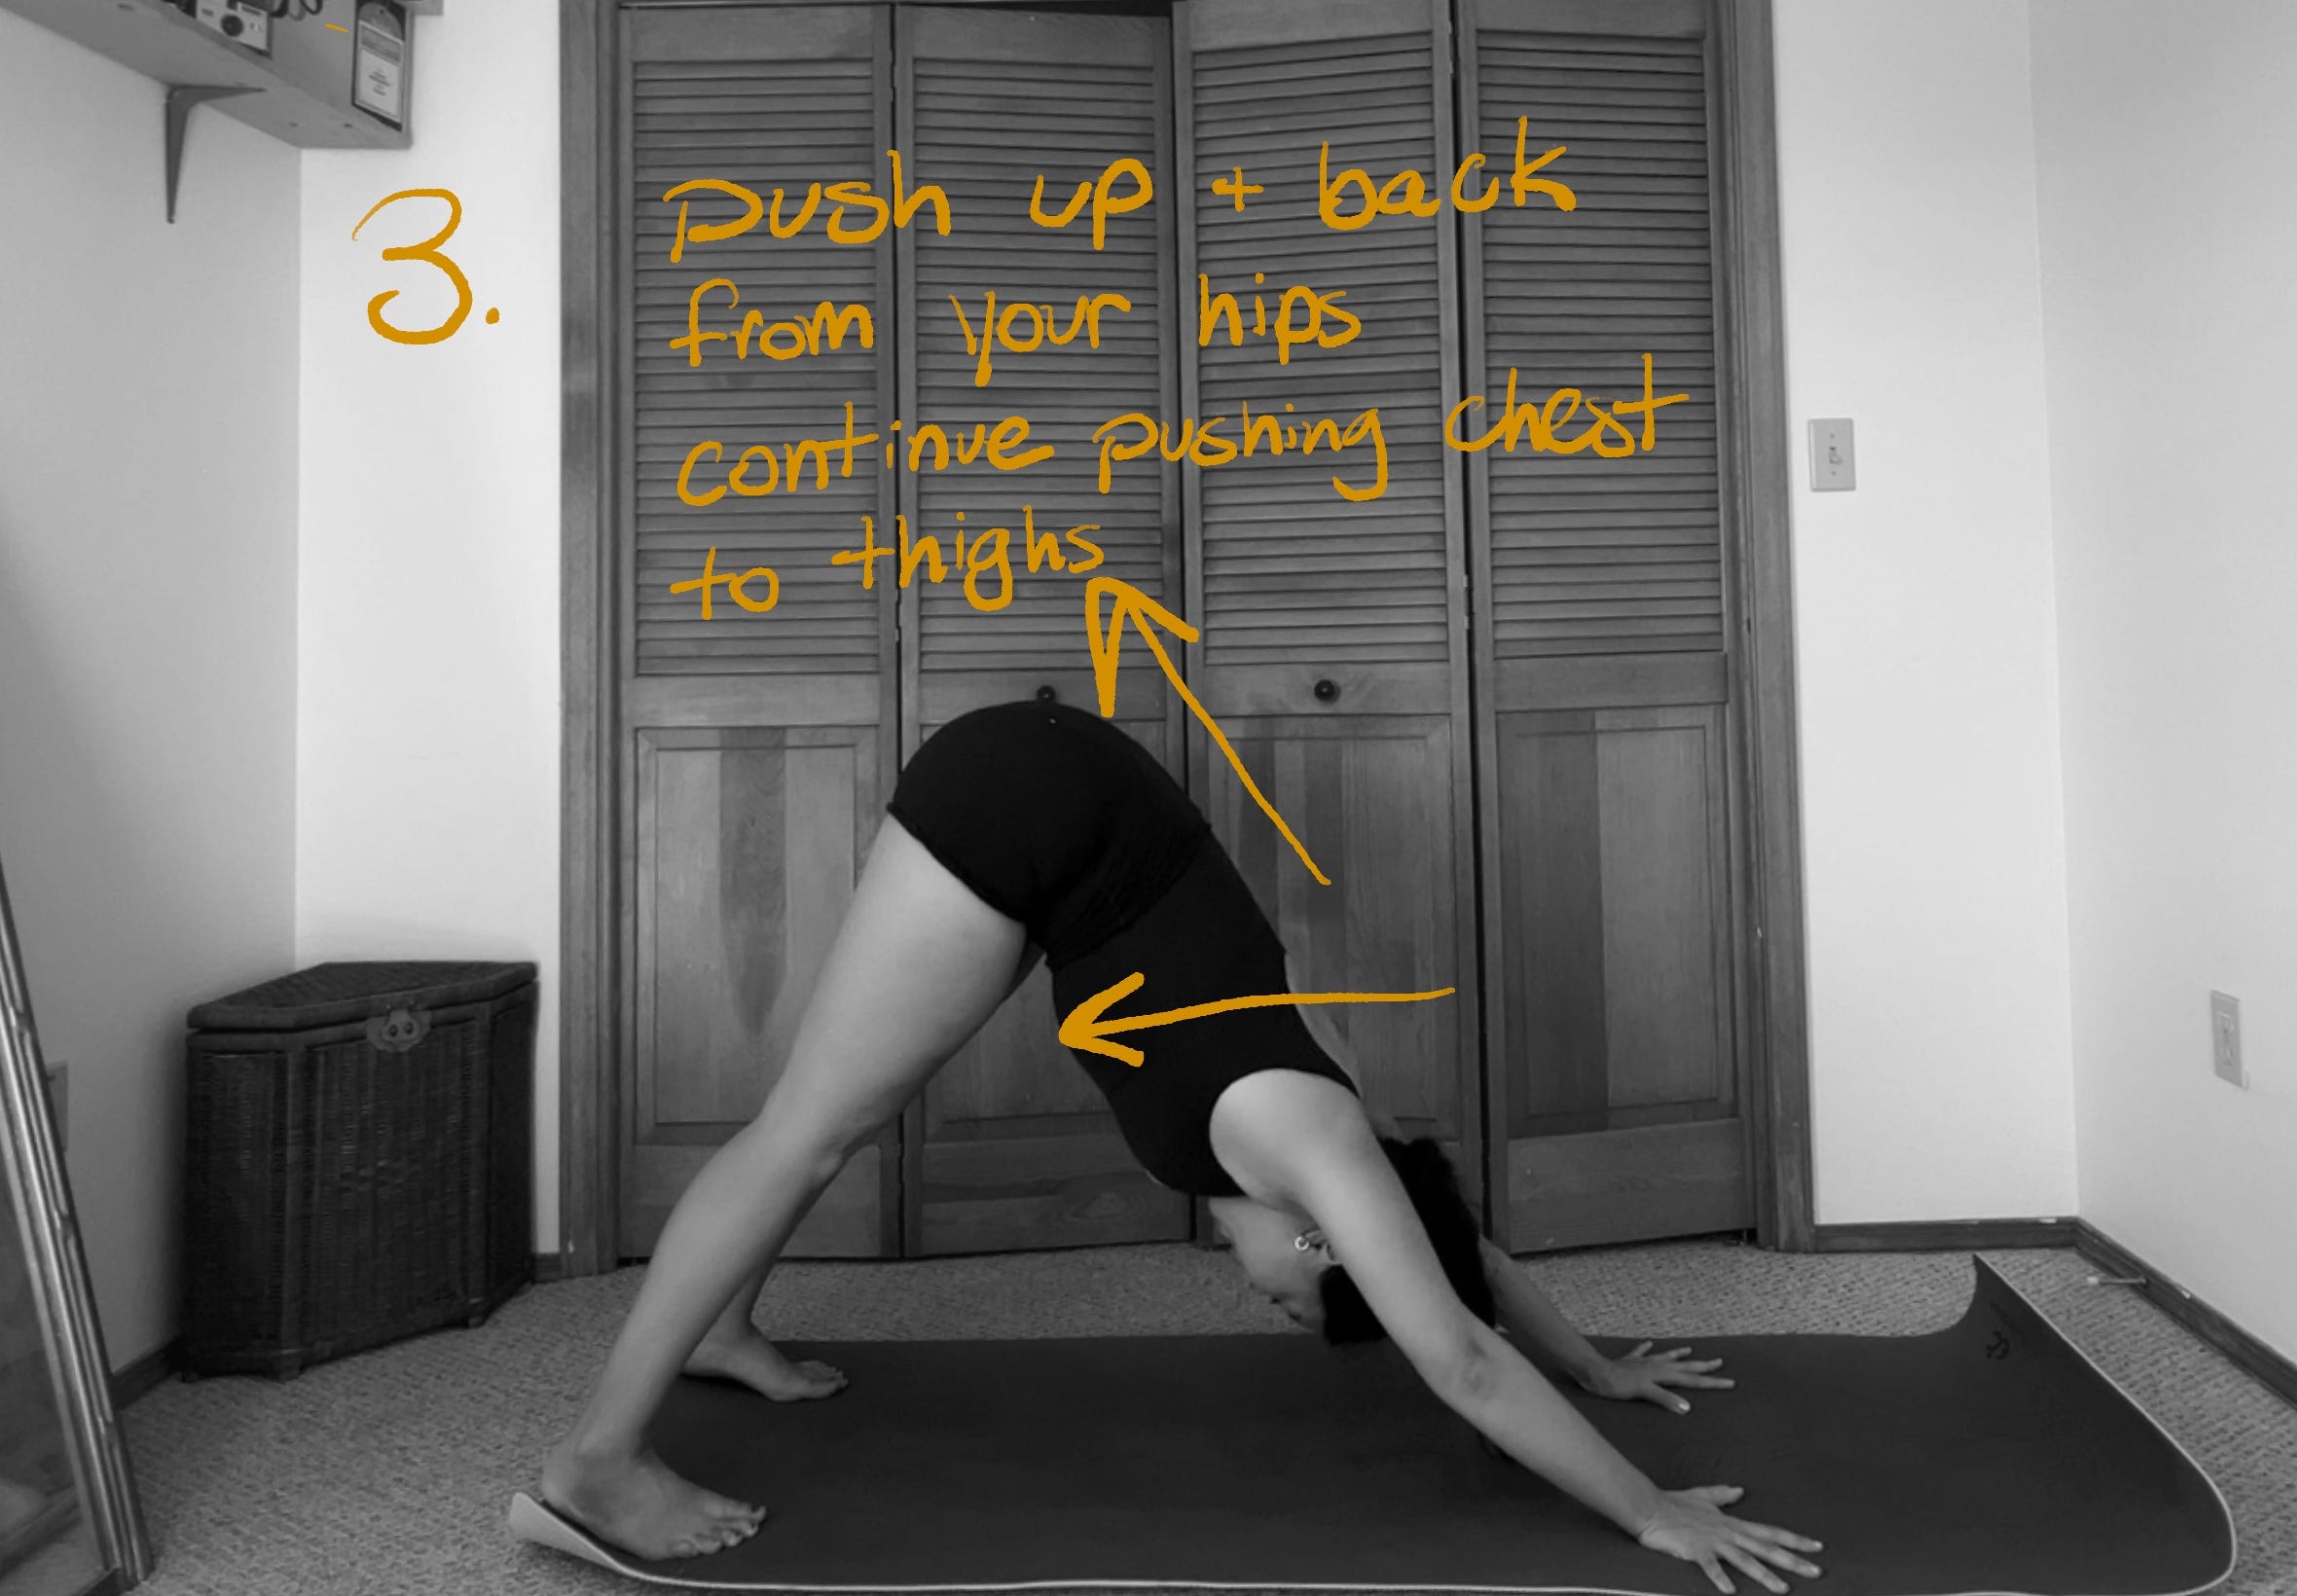
Now, let’s practice finding the pose in a way that makes it easy to feel your hips lifting and the energy going up and back. You don’t always have to enter downward dog this way, but practice this lil exercise so that when you’re in downward dog, you know how it is supposed to feel—that way, no matter how you got into the pose, you can self adjust to find this up and back alignment.
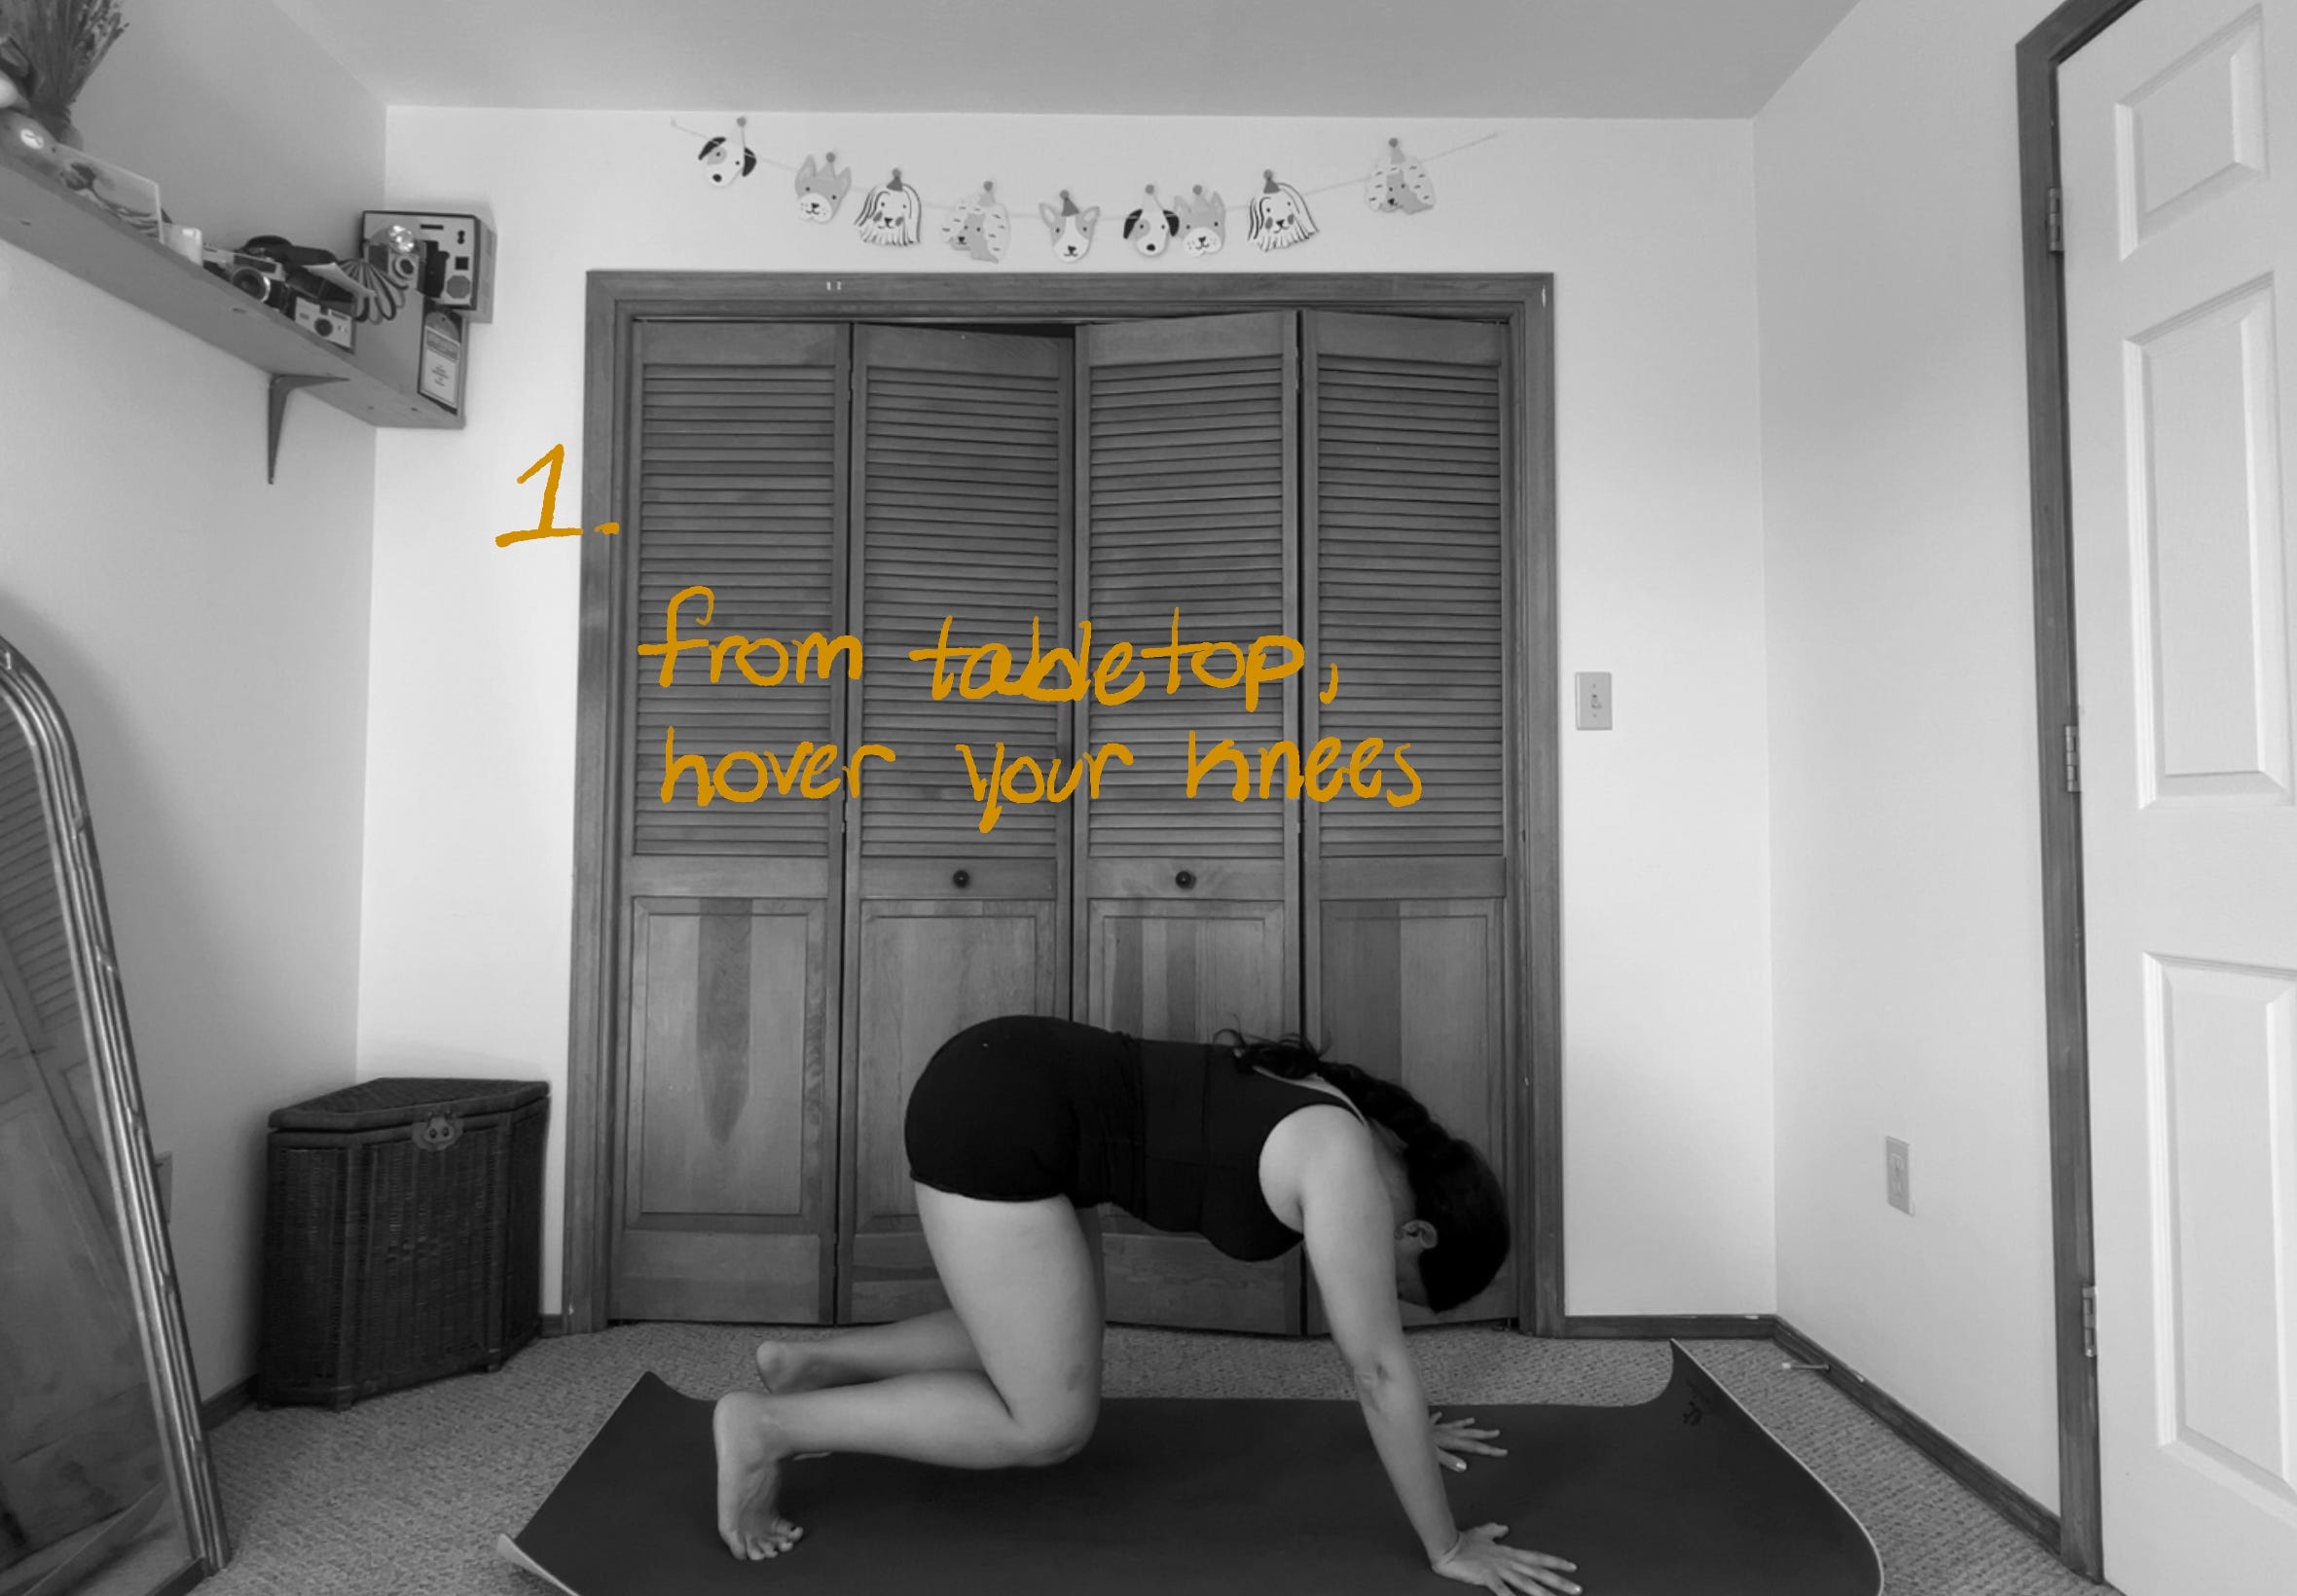
Note: don’t worry if you’re heels don’t touch the ground! For some people, the proper anatomical alignment of this pose means that their heels won’t touch, but their legs, hips, chest and arms will be exactly as they should be. If they don’t touch the ground, energetically practice hips up, heels down.
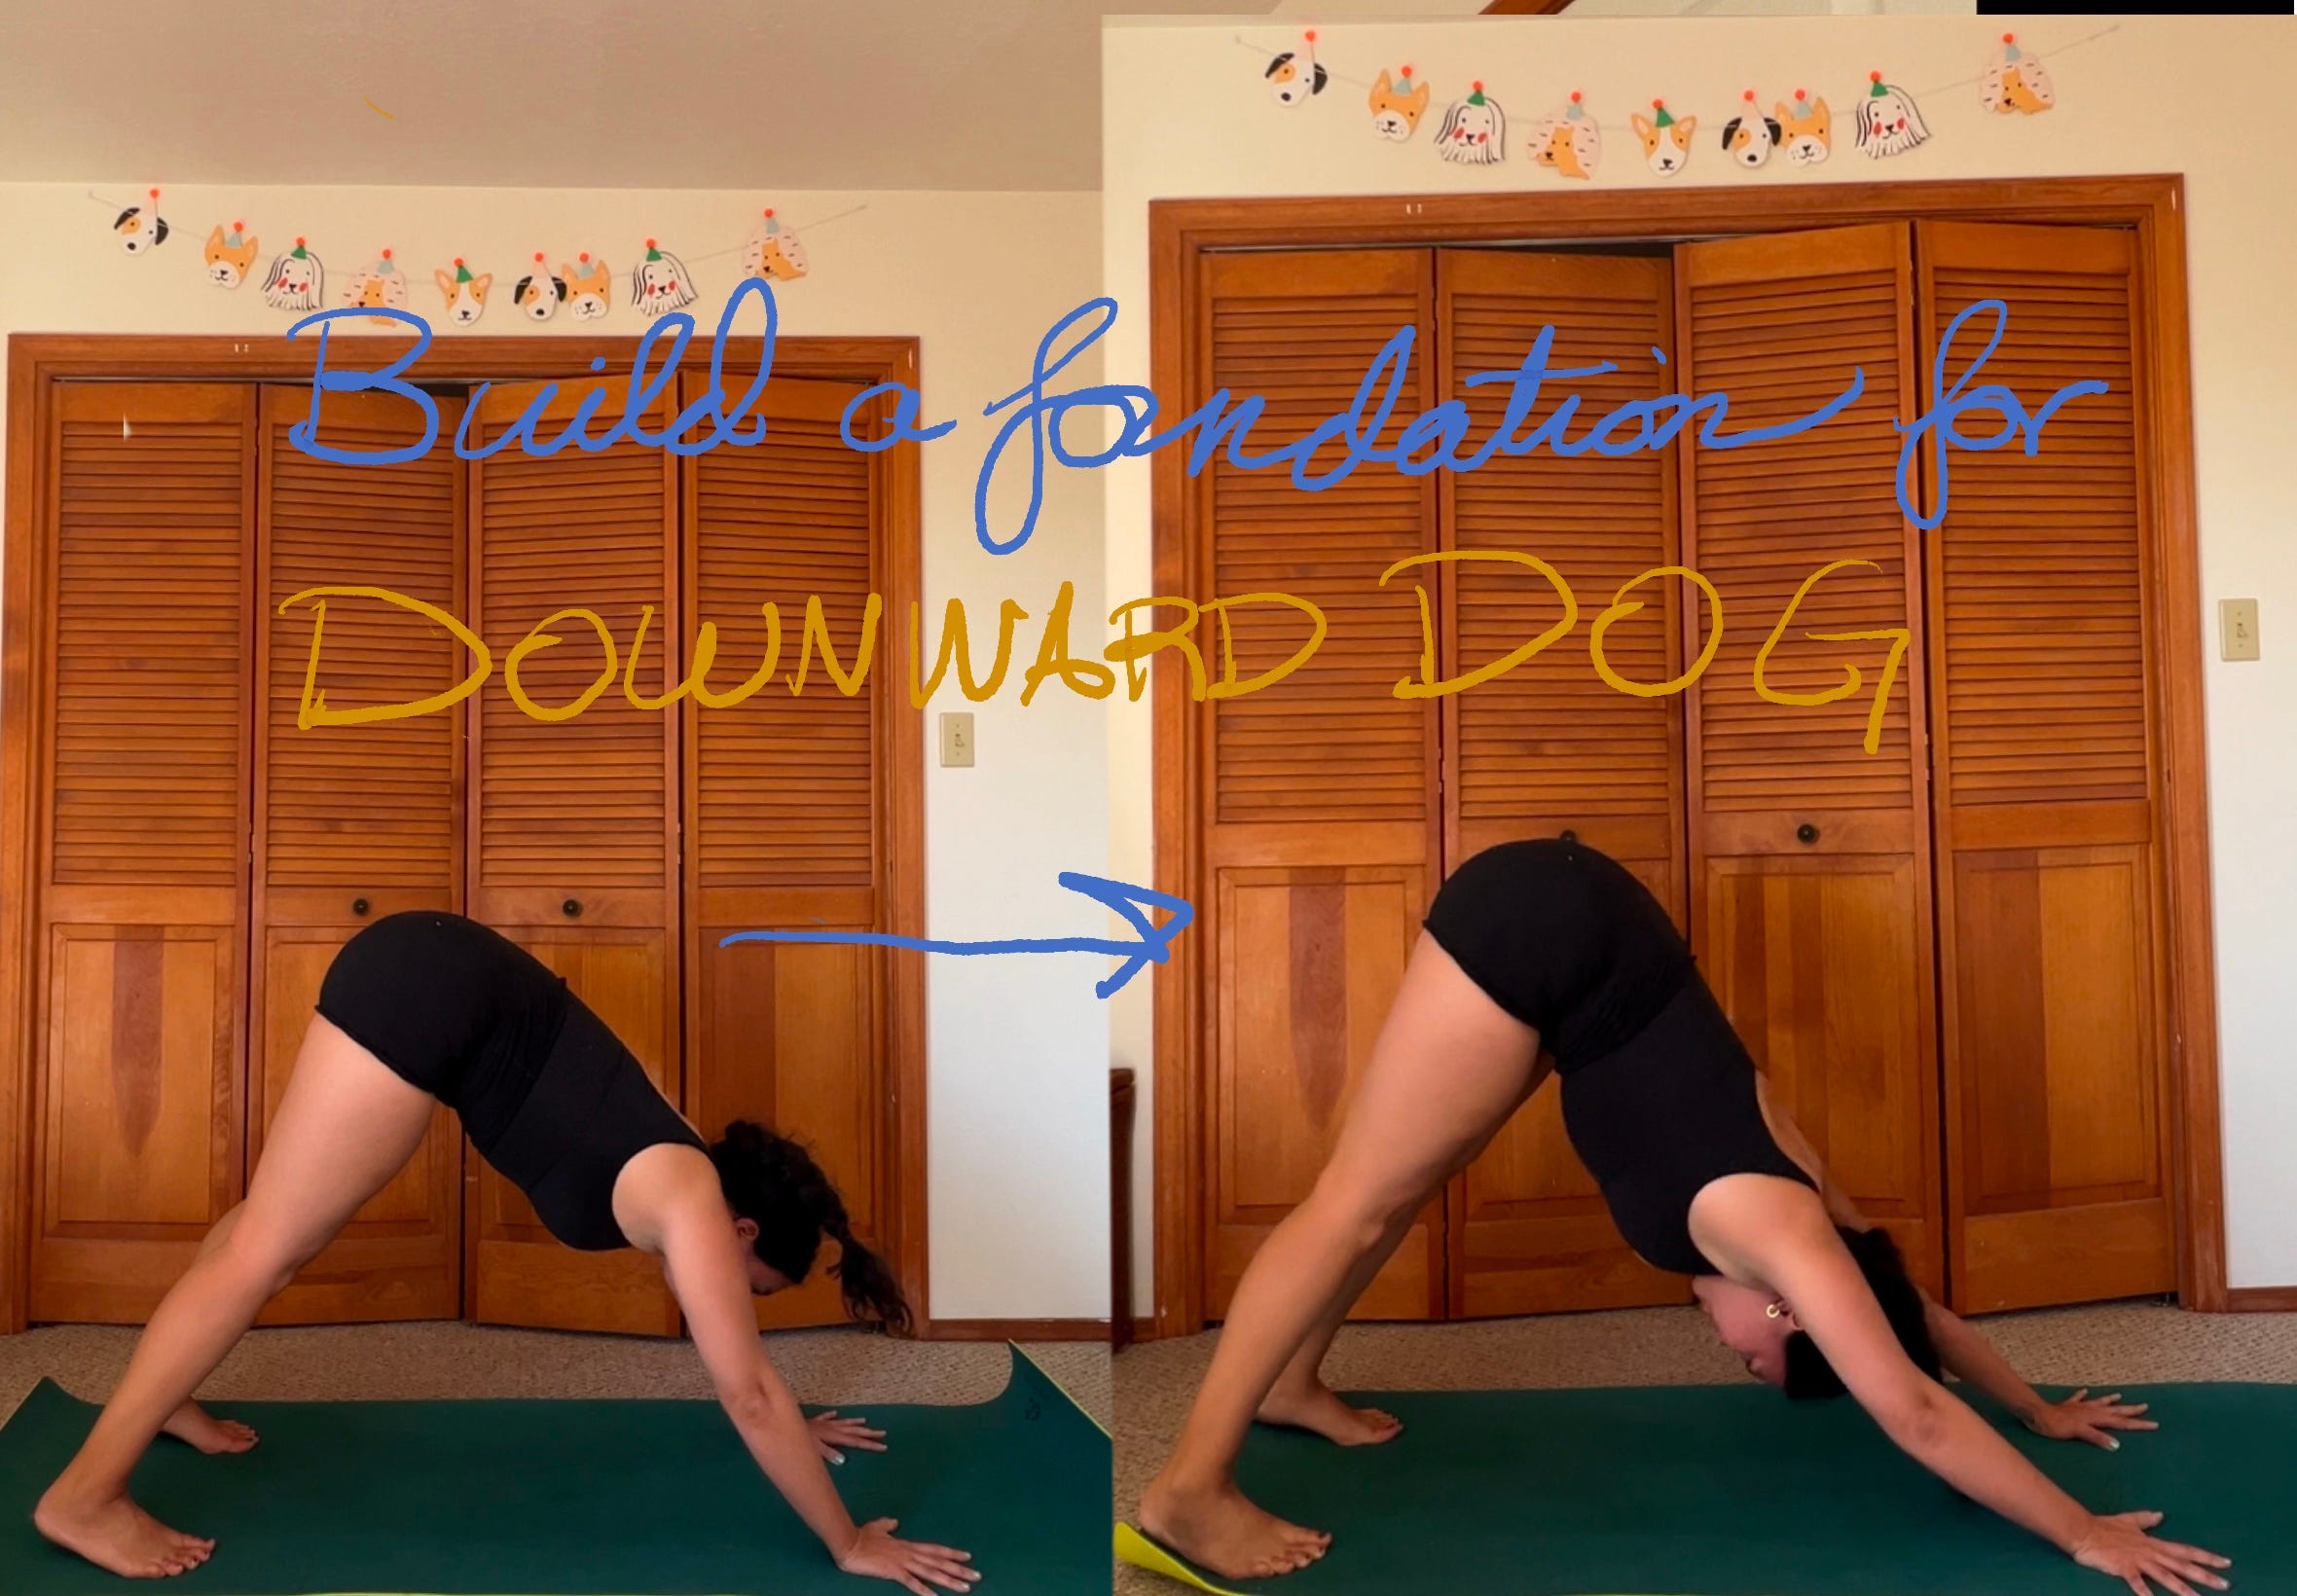
COMPARE!
There is still a lot of ways I can improve, but here is a general comparison! Try this before and after photo to see the difference—do a downward dog as you’d normally do it, and then try lifting your hips up and back!
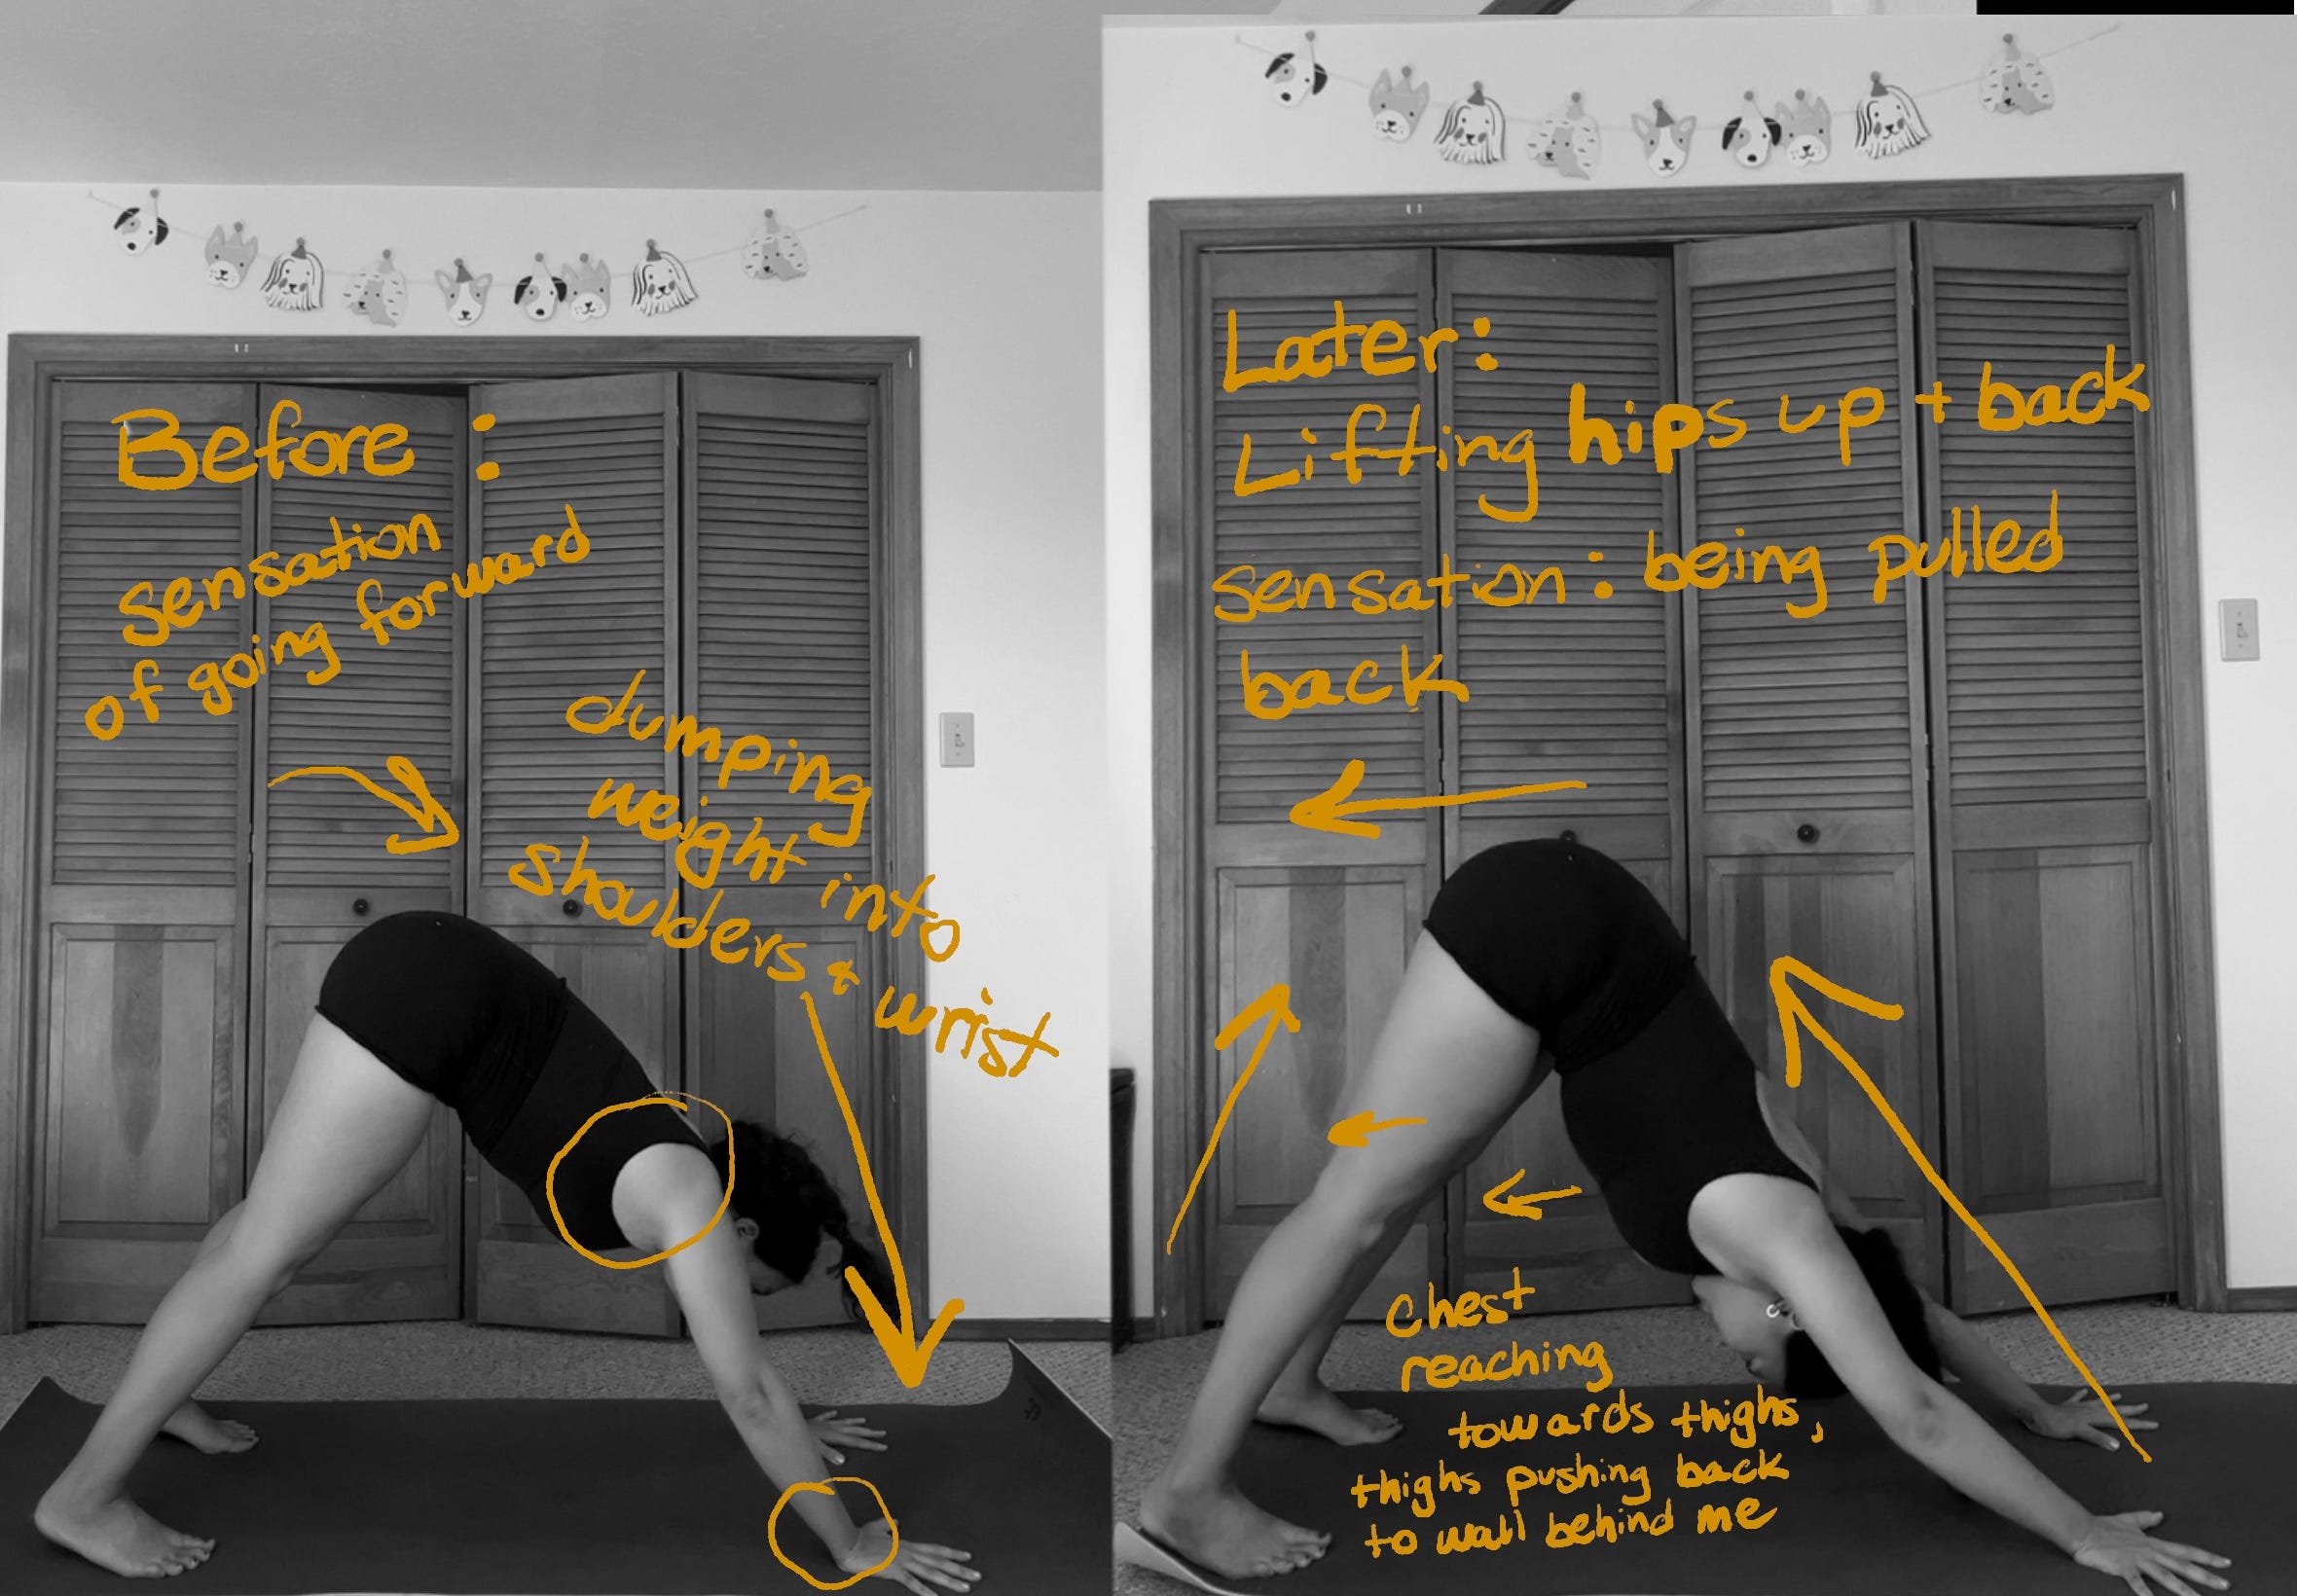
TIP: One trick I do (wish I forgot to mention in the video,) is if I’m in downdog and I can tell I’m dumping into my hands/ my shoulders are not descending down my back (e.g. towards my hips,) I’ll bend my knees just a little so I can bring my chest closer to my thighs, and then I’ll push up and back with my legs to find that alignment again.
Here’s some examples from professionals around the web. If you compare their pose to mine, you can see that I need to work on improving the distance between my hands and feet! The wider base helps with the distribution of weight and the stretch downward dog provides.


Ok, that’s the basics! Many of y’all probably knew a lot of this info, so I appreciate your openness in trying this lil exercise! Lemme know how it goes 💕
Talk soon y’all!
Sending health and joy,
Elaine

Share this post